


Detailed explanation of six types of EROWA fixture applications
01
erowa pneumatic chuck
【Terms of Use】
1. Before clamping the product, keep the surface of the chuck clean and free of debris or other debris;
2. After the product is clamped by the chuck, remember to disconnect the air pressure and check whether the product is clamped in place;
3. After processing the product, the air pressure must be cut off during the cleaning of the residue to prevent the residue from splashing into the chuck, which will shorten the service life of the chuck.
【Precautions】
The chuck can only be fully opened when the air pressure is above 6kg.
02
erowa Manual chuck

【Terms of Use】
1. Keep the surface of the chuck clean and free of residues before clamping the product.
2. After the chuck has clamped the product, check whether the lever is in place.
3. After processing the product, the chuck is locked in the process of cleaning the residue to prevent the residue from splashing into the chuck, resulting in a shortened life of the chuck.
【Precautions】
Use the stainless steel handle lever to control the locking of the turntable. If the force is not too strong, just lock it.
03
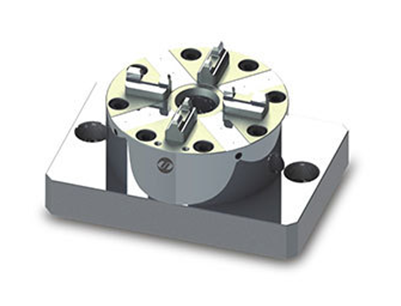
erowa chuck

【Terms of Use】
1. Before use, you must check whether the parallelism of the four hexagonal nails is within the tolerance range.
2. The chuck must be clamped within the allowable range according to the material specifications.
3. When using the side screws to lock the electrode, it cannot be violently locked, and it should be properly locked with even force.
【Precautions】
1. The operator should regularly check whether the hexagonal nails on the base of the chuck are damaged. If the damage is serious and cannot meet the standard, they should be replaced in time.
2. Ensure that the overall chuck is intact and clean before clamping to ensure no residue.
3. After the chuck is not in use or after use, it should be placed on the bracket for safe storage to prevent wear.
04
erowa zero reference seat
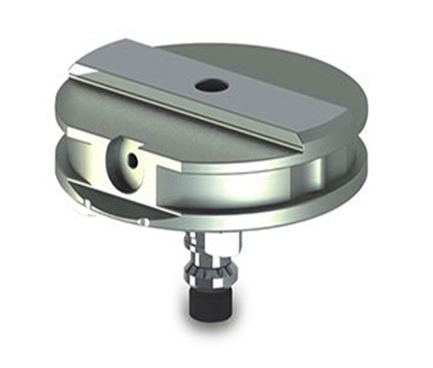
【Terms of Use】
1. It is used to detect the middle aperture of straight line and plane, Φ12 is used to measure the centring concentricity.
2. The side T-slot avoidance position is used for automatic and fast clamping of automated manipulators.
【Precautions】
1. The reference base is a testing device to ensure that it is dry, free of debris or dust, and the ambient temperature should be in the range of 5 ~ 40 ℃.
2. Calibrate and adjust the test fixture before use.
3. After the test fixture is used, carefully dry it with clean gauze, apply anti-rust oil and install it in a special box for safekeeping.
05
erowa centering test rod

【Terms of Use】
1. Clamp to the machine head, connect the work piece and the tungsten steel ball with a metal bar to check whether it is normal, and make a sound when it is correct.
2. When testing or scoring, select the appropriate end face to ensure the accuracy of testing.
【Precautions】
1. The operator should be familiar with the instructions for use of this test and inspection tool, and use it strictly in accordance with the operating specifications. Pay attention to protect the test and inspection tool from falling and touching, and do not put it near moisture and corrosive gases.
2. Do not attach foreign objects or fine dust when splitting or testing the end face.
3. During the testing process, the testing rod is strictly prohibited from direct discharge testing on the end face of the product. It is best for the operator to wear high voltage, insulated gloves must not be in direct contact, and the probe and the object to be detected are to prevent electric numbness.
4. After using the inspection tool, it should be placed in a special box for safekeeping.
06
erowa video detector
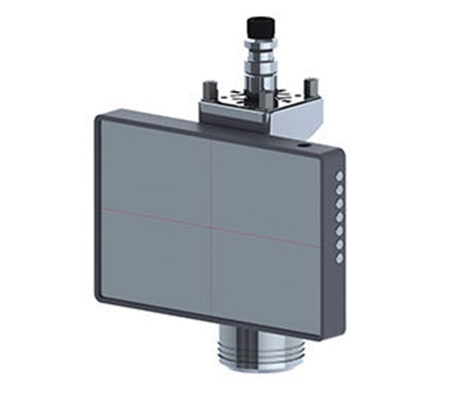
【Function keys】
AG: The angle of the crosshair can be adjusted. Press the left button to rotate the crosshair counterclockwise, and press the right button to rotate clockwise. Long press can rotate quickly, and adjust the angle of 5 minutes with a single key press.
CN: Adjust the gray value of the graphic, that is, adjust the sensitivity of the automatic edge search according to the current graphic limit of the center point of the cross line. When the difference in the brightness of the edge image is greater, the value of CN needs to be adjusted larger. At this time, a red edge line will be generated in the center. The best case is to make the center edge have a red line and no other position will appear.
AG OFF / ON: Turn on / off the automatic edge finding function.
SE: It is an edge enhancement function. Each time you press the right button, an edge enhancement function is added.
Home | About Us | Products | News | Recruitment | Feedback | Contact Us
Address: Jufeng Special Crystal Industrial Park, No. 1, Weiming Road, Xin'an Community, Chang'an Town, Dongguan City, Guangdong Province Tel:0769—83005586 Fax:0769—83005587 Contact: Mr. Wang Zuokai 13686082088 Email:wangzuokai@dgtjdw.com Copyright © Dongguan Tejing Precision Fixture Co., Ltd. All rights reserved< | 
|